Webopac Preferences – Options and Texts
- Introduction
- Restrictions
- Thesaurus search
- Locations, material types, indexes
- Other restrictions
- Boolean operators
- Error messages
- SDI and profiles
- Loan status
- Borrower information
- Item information
1. Introduction
This option allows you to define the descriptions for much of the interface. Further text modifications can be made in the individual profile definitions.
· Click the button under the All Profiles section on the Start page.
The Options and texts screen is displayed:

· Select the language that you want to use to define the wording for Options and texts.
Note
This screen is quite long. To see the rest of the options, use the scroll bar at the right hand side of the screen to move up and down the screen page.
Use secure connctions: In order to get the secure connections (via https) working for User Activities only in WebOpac, the library must first have their server's Internet Services set up to use a valid Security certificate. Next you need to check this parameter. On installation this parameter will be OFF.
Namespaces, etc.: Do not change these parameters. They will have been set up during the installation by Infor.
2. Restrictions
This section allows you to enter the databases that you want to make available for restrictions.
Note
Do not add a database or click the button without informing Infor first. However, you can change the wording.
Restrictions limit a search to the selection specified in a search. For example, a user can limit a search by language, material type and location. Restrictions are defined in AFO 151 Indexes – Restrictions.
· Select a defined database from the drop-down list.
· Click the button to add a new database to the list.

· Enter the description for the database in all of the language text boxes.

· Click .
3. Thesaurus search
Note
The Thesaurus feature is a separately licensed module of Vubis Smart. Please contact your sales representative for installation and activation of this feature in Vubis Smart.
4. Locations, Material types, Indexes
The next sections allow you to specify restrictions for a particular database. When you wish to modify the locations, types of document and index by database, you must chose the database from the drop-down menu.
· To specify the database select a database from the drop-down box:

4.1 Locations
This section allows you to specify which locations a user can use to limit a search. The available locations are added at the time of installation by Infor.

· To add a location select from the drop-down box
· Click the button.
· Enter the wording you want to appear on the user screen, for all languages.
· Click .
4.1.1 Sublocations
If you use sublocations (and a table is set up via AFO 613 – Sub-locations) you can set up restrictions for this in the same way as described above for locations.
Please note
After selection of a database it is possible to select a default location and other locations from the dropdown list of locations defined for this database. However, it is possible to show locations in the list that are linked to other databases. Please contact Support Staff for more information.
4.2 Material types
This section allows you to define which material types a user can select from to restrict the search. You can decide when creating a profile and search method, whether to offer the restrictions or not.

· To add a new material type, select from the drop-down box.
· Click the button
· In the Wording new material type dialog box, enter the wording you want to appear, for each language text box.
· Click .
· You can select more than one material type by holding down the control key and clicking on each type.
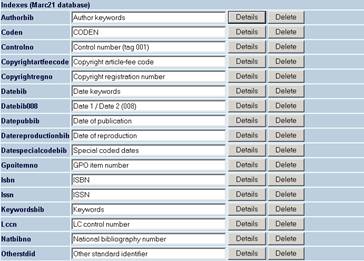
4.3 Indexes
The available indexes are those which have been defined for the database (in AFO 151 Indexes) selected previously. The indexes selected here will be available in the drop-down box for the user to select in a search.
Example:


· To change the wording, click the button next to an index
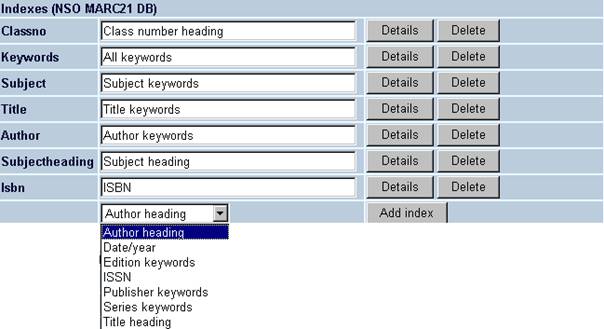
The following screen is displayed:

· Enter the wording you want to display in a user search, for each language box
· To add an index, select from the drop-down menu and click the button.
· You can also specify which equivalent index is used if the user searches in another database. This option is only applicable if you allow the user to search other databases.
Note
Using the option will only delete the index from the list. It will not delete the index itself.
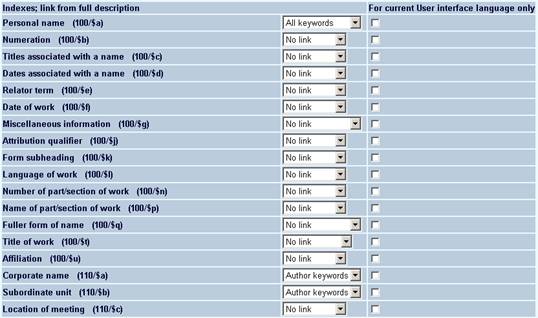
4.3.1 Indexes – link from full description
This section allows you to specify which index is searched when the user clicks the link in the full description field. For example, if the user clicks the link in the Author field, the following example specifies that the index searched is the Author keywords index.

For each field, the associated drop-down menu contains only indexes that are relevant for that field. You can specify that the link is made for the current User Interface language only, by clicking the check box next to each link definition.
5. Other restrictions
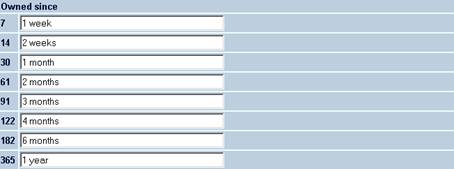
5.1 Owned since
This section specifies the wording for the restrictions on number of days since the title was added to stock. These restrictions can be added to a profile and search method.
This option does not take account of the availability of the item.
· Enter the wording you want to display as equivalent to each number of days e.g. 7 (days) = 1 week.
5.2 Price
Select all values that must be shown in the drop down lists.
5.3 Captions for restrictions
Use this section to specify the wording you want to appear for restrictions.
This is the wording that appears next the these options on the search screens.
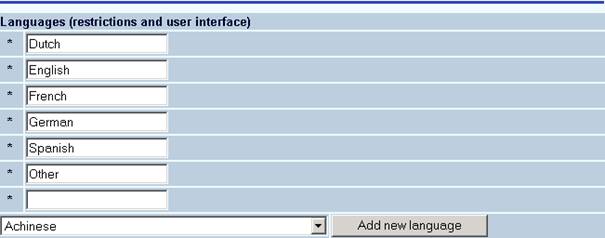
5.4 Languages
This section specifies the language codes that can be used to restrict a search. The languages available for selection are defined in AFO 113 Authority Management – Lists. When you add a new language to the list for restrictions, you can define the wording for the description of the language, for all your user interface languages.
When searching, the system looks for the language code in the equivalent field of the bibliographic record (e.g. for MARC records that is in tag 008).

· To add a new language code to the list, select a language from the drop-down box
· Click the button.
· Enter the wording you want to describe the language, for each language text box.
· Click .
6. Boolean operators
Use this section to change the wording for the Boolean operators. As these are standard operators Infor recommends that you only change the case of the wording, for example from “not” to “NOT”.

7. Error messages
Use this section to change the wording of error messages. Take care when doing this that you are fully aware of where these messages appear.
You also have the option to customise the csp-error pages, with the second line “An unexpected error has occurred. We are unable to process your request ...”. This text can be modified and is of course language specific.
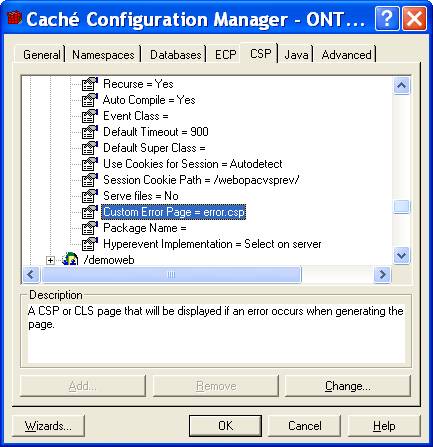
You have to activate the error.csp page via the Caché control panel:

For the CSP application specify the error.csp as its error page

Instead of getting the CSP message with all the details, the WebOpac user will see:
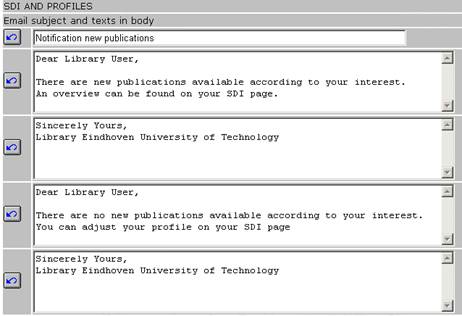
8. SDI and profiles
Use this section to determine what appears in subject and body text of email messages to users who subscribe to the SDI option.

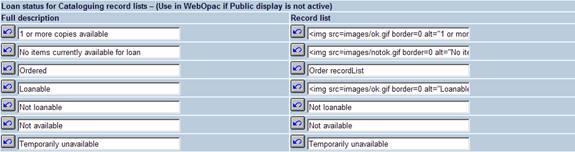
9. Loan status
Use this section to describe the various loan statuses of your items. You can make separate descriptions for the record list display and the full record display.

Instead of wording you can also use icons to denote the availability status of an item. In this case you must use HTML code to denote the icon that must be used.
Example:
<img src=images/ok.gif border=0 alt="Item available">
Note
In case of collection in transit for administrative and off line managers, text no. 6 is shown, except for selected managers, for whom a special text can be defined.
10. Borrower information
Use this section to define which parts of the borrower record are displayed in the WebOpac.
· Select a Group from the drop-down list

· Click the button
· Enter the wording for the group in the Wording new group window and click .
The group name is displayed in the Groups list.
· In the Fields per group section select a field that you want to display

· Click the button
Note
Be careful to add the fields in the order you want them to display in the WebOpac. There is (as yet) no way to move the display of fields.
11. Item information
Use this section to define which parts of the item are displayed in the WebOpac.
· Select a Group from the drop-down list

· Click the button
· Enter the wording for the group in the Wording new group window and click .
The group name is displayed in the Groups list.
· In the Fields per group section select a field that you want to display
· Click the button
Note
Always remember to click the button to save any changes you have made.
